In an effort to find stainless steel hardware at a price that didn't make me feel like I was being suckered out of my hard earned money I went on a mission last Saturday. I was starting to get embarrassed when I would start to cry in line at West Marine just looking at the price tags on the items I could carry in one hand. Plus I would get strange looks.
Now we all know that if it says "marine" anywhere on it it will be waaaay more expensive that if it just said 304 stainless. (I know, not everything can be made it 316 stainless, give me a break will ya!!) (Opps I'm still in my West Marine mode.) Where was I oh, yea, so Saturday I head out to find descent prices on stainless nuts bolts, etc. I tried home depot. (Want to have fun, tell the "hardware" guy there you need a 3/4" stainless steel nylock nut. You can actually see the question mark come out of the top of his head while his eyes start to glaze over.) Lowe's. (Refer to remark about about home depot.) Mom and Pop hardware stores and finally Ace Hardware, BINGO, WE HAVE A WINNER! Can you hear the bells? Ace Hardware has 304 stainless steel hardware, all thread, screws, oh the list goes on, bins and bins of the stuff, like I died and went to hardware heaven All at a good price! How do I know it is 304 stainless, well it is stamped on it. When is the last time you ran across a lying stamp? Ya, I thought so, never sucker. (Opps my city talk is coming out, please pardon me). But wait they carry "marine" hose clamps, holy bedsheets look at that price and I thought West Marine was expensive.
Be careful....your mileage may vary. All stores named in the above story are innocent until proven guilty at the cash register. Shop for marine items at your own risk.
Monday, August 20, 2012
I've been making progress, honest.
Ok I admit that I thought I would have the bowsprit on by now. But man I didn't know there would be so many other things that would need fixing or just needed to be done too. Lets see.... the bowsprit is rotten, get bids for a new one, order it, wait for it, go pick it up, check it to make sure it is correct, put a coat of penetrating epoxy on it, lightly sand it, clean it, put another coat of penetrating epoxy on it. Get paint, read about the paint, buy the supplies to paint, lightly sand the bowsprit, clean it, put a coat of primer on, don't wait for it to dry completely,lightly sand it, screw up the primer then sand it off completely,clean it, put another coat on, wait for it to dry complety, lightly sand it, clean it, put the second coat on (really the third), wait for it to dry, sand it lightly, clean it, put a coat of paint on(finally!), wait for it to dry.....that is where I am now. No big deal you say? I work ten hours a day with a one hour commute (1\2 hour each way) So up at 5am home at 5:15 pm and then I can start on the boat projects. (Am I whining? IT sounds like whining to me!) But I like my job, so no complaints.
The moral of the story is to keep doing a little each day. Like the saying goes a long journey starts with one step. So just keep stepping! After all this is going to be our house, and our escape pod from the rat race. I have my eye on the goal and ENJOY all the little things that seem to slow things down. I feel better just knowing that I will have intimate knowledge with EVERYTHING on this boat when I have to fix something out in paradise!
Can I go now I really want to work on the boat some more, your distracting me......
Engines from thought to bought
So I bought the Yanmar 3JH3E. I checked it out as best I could and did a ton of research and made the decision to buy the iron jib. I found out that there is a common problem with Yanmar heat exchangers. It seems that if the engine is level and not on a slight slope to the rear the heat exchanger will not drain out all the seawater. So it sits there doing what sea water does best....eats metal! Yea it supports life too but not metallic life! Now this engine had 243 hours on it and is about 10 years old. That's 24.3 hours average a year. Yanmar said that when a engine is going to sit for awhile you should flush out the salt water side with fresh water so it will not eat up the heat exchanger.They still make parts and it seems to be a popular engine. Parts can be found all over the world, meaning where ever I am the parts will be too! (Yea I know, wake up and smell pay the imports fees dreamer!)
None the less this engine will get Nellie Jo out on the water sooner and I'm all for that. For now I have covered the engine and will set it to the side while I continue with the bowsprit and chain locker project. I don't like to start to many projects at once less I get overwhelmed! Here are some pictures of the "new" engine.

Hey Curtis, can you come over and fix this thing for me?


Tuesday, August 14, 2012
Thoughts of engines
While at the place I bought the windlass I run across a Yanmar 38 hp 3JH3E. It is about 10 years old and has 245 hours on it. It seems to be in great shape.....but the exhaust manifold had a crack in it and leaked a bit of water. The manifold was taken off and promptly lost. I have priced out a new manifold and with the price I think I can get the motor for it would be worth it. At least that is what all the research I have done tells me. I could continue to save and get a new motor which would set me back $10-$12K+. Or I could but a running used one if I could find one local. That would be $6K minimum. Or I could buy this one and replace the parts myself. I'm kind of handy so I don't think it would be a big deal.
Having to save up will take awhile and I can't sail the boat during that time. But if I get the Yanmar I could be sailing in a few months. Diesels are supposed to last for thousands of hours before a rebuild so it just seem I wouldn't be risking much by going with the Yanmar.
What are YOUR thoughts on this? Let me know.
SL-555 Windlass and bowsprit update
While looking cruising through the craigslist I found a Simpson Lawrence windlass model 555 for sale. The owner wanted a bit to much for it but I called to see if he would be at his shop so I could go and look at it. I arrived at his shop to see that he has a ton of marine equipment there. This guys buys boats that are damaged, or cheap or from people who just want to get rid of them. He then parts them out for what seems to be decent prices. Anyway the windlass was not beat up and worked as smooth as it ever would. But the gypsy (the part that winds the chain on or off the boat) would not freewheel. But this is a fairly common problem with ones that don't get used much, as this one appears to be. I offered what I thought would be a decent price and he accepted. So I am the proud owner of a new to me windlass, the exact model I wanted. So now I can figure out how to mount it while my bowsprit is still off. Oh, for what it is worth I was told this windlass came off of Dennis Conner's old wooden boat. (Whatever)
Speaking of the bowsprit. I finished putting a coat of primer on it last night. Tonight I hope to get a coat of paint on it and the Samson posts.


Speaking of the bowsprit. I finished putting a coat of primer on it last night. Tonight I hope to get a coat of paint on it and the Samson posts.

So what is the name of the tapered piece of wood that goes under the bowsprit? I have no clue. But above is a picture of it!

Just a quick sanding then ready for paint!
Tuesday, August 7, 2012
eeww that smell, can you smell that smell...
Lynard Skynard sang it, I had to remove it. Last Sunday 7-5-12 I made it my mission to remove the head and all the associated hoses and holding tank. There was a ... shall we say... a certain funk to the boat when you opened the hatch. Since we do not use the head at this time and I was tired of the smell it was time to be rid of it. It took about 2 1/2 hours to do the demo. It could have taken less time but the previous owner had plumbed the holding tank in such a way that the hoses were also full. Nasty, Nasty, Nasty. I had the mobile pump out company pay the boat a visit last week so there would be as little as possible in the tank and hoses.

I suited up with rubber gloves, and towels and two rolls of paper towels and a fan pumping fresh air into the boat. I figured I was ready to do battle with the poop........ I was wrong. EVERY hose has some form of nasty in it. Now these hoses for those who don't know are special hoses. They are designed to keep the smell from permeating through them, thus they are tough. So tough that I could not undo the hose clamps and pull them off the fitting. Nooo I had to cut them. Cutting doesn't sound bad, but I found out that saltwater will crystallize inside these hoses to form a rock, a poop rock if you will.Yea, 1 1/2" hoses restricted to less than 1/2" Did I mention NASTY, NASTY, NASTY? I had to wash the bidge out also as I had some "spillage".

Ok, enough with the details or I'm gonna toss my cookies. In the end I won! But I had to take a loooooooong hot soapy shower to get that crap off of me. (Or at least I thought I had crap on me!) I swear I could smell poop for days after in places I normally don't smell poop. I think I was just paranoid that I missed some speck of nasty.
So now its Tuesday I feel clean and I don't smell the poop anymore.
So the plan when I install a new head is to plumb it correct and legal. I will look into somehow keeping the saltwater used to flush the toilet from stinking. I hear putting a seawater strainer helps. But the research and install will have to wait until later.
Now that I think of it my fellow workers kind of shunned me Monday maybe I did miss a spot.....

THE OFFENDER
I suited up with rubber gloves, and towels and two rolls of paper towels and a fan pumping fresh air into the boat. I figured I was ready to do battle with the poop........ I was wrong. EVERY hose has some form of nasty in it. Now these hoses for those who don't know are special hoses. They are designed to keep the smell from permeating through them, thus they are tough. So tough that I could not undo the hose clamps and pull them off the fitting. Nooo I had to cut them. Cutting doesn't sound bad, but I found out that saltwater will crystallize inside these hoses to form a rock, a poop rock if you will.Yea, 1 1/2" hoses restricted to less than 1/2" Did I mention NASTY, NASTY, NASTY? I had to wash the bidge out also as I had some "spillage".

SANITIZED!
Ok, enough with the details or I'm gonna toss my cookies. In the end I won! But I had to take a loooooooong hot soapy shower to get that crap off of me. (Or at least I thought I had crap on me!) I swear I could smell poop for days after in places I normally don't smell poop. I think I was just paranoid that I missed some speck of nasty.
So now its Tuesday I feel clean and I don't smell the poop anymore.
So the plan when I install a new head is to plumb it correct and legal. I will look into somehow keeping the saltwater used to flush the toilet from stinking. I hear putting a seawater strainer helps. But the research and install will have to wait until later.
Now that I think of it my fellow workers kind of shunned me Monday maybe I did miss a spot.....
Monday, August 6, 2012
New Samson posts and bowsprit preview
I received a call that my new samson posts were ready. So I headed over to H&L to pick them up. I was able to get a sneak peek of my bowsprit too!
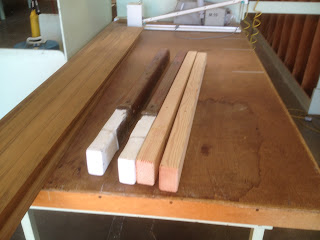 Yea I know this picture sucks....looks like a couple of 2x4s just laying there. But honest they have all the holes and are shaped just like the old ones on the left.
 Here is Russell at H&L working on the bowsprit. You can see he was working on getting the round stainless fitting (what's that called?) to fit. If all goes well I should have the bowsprit in a day or two! When I get it I will do a bare dry fit on the boat to make sure all the holes line up. If they do I will bring it home, coat it with penetrating epoxy and then paint it before doing the final installation.
Better pictures of the samson posts with two coats of penetrating epoxy.


Better pictures of the samson posts with two coats of penetrating epoxy.


Chain Locker Bulkhead Part 1
It appears that the bowsprit sucked up water which drained to the samson posts which in turn went into the chain locker bulkhead.


I have been trying to figure out how to repair the bulkhead without having to replace the whole thing. Bud Taplin during his survey said to just cut to the tabs and attach the new plywood to that as that area is still sound. That is what I am going to do but I want to be sure I make it look as nice as possible.
I figured I should cut out all the rot then I would know what I have to work with. This is what I ended up with.

Looks like its time to clean the lens on my phone!
What I have done so far is to make a template of the sides of the hull in cardboard. I will not be able to put in one big piece of wood because I just can't physically get it in this space. So I will have to do at least two pieces of wood. The samson posts are bolted to the bulkhead. So the bulkhead is tight to the samson posts. This means I can't double up the plywood on the backside of the bulkhead as this would not allow my samson posts to come down from the deck. I guess I could cut a piece of plywood to cover the opening as you see in the picture above. My concern is that the samson post get some of it's strength by being attached to the bulkhead. So instead of that I might fiberglass in a 2x4 near the bottom of the samson posts to the hull and bolt the post to that. I think that would actually be stronger than it was before.While in this area I want to split the chain locker in two and run a PVC pipe down from the deck to below the V berth to allow the chain to be stored below the shower pan. This detail is shown in the Westsail factory manual that came with the boat. I want to try to keep as much weight out of the front of the hull as possible.

As soon as I figure out what I want to do I post again about this...so stay tuned for more exciting chain locker bulkhead drama!
Bungs
8-4-12 So who knew where the saying "bung hole" came from? I do now! I went through and dug out the old epoxy from the bung holes that had no bung in them. I had to remove a few of the screws and drill the hole a bit deeper as the bungs on those would not stay in. While I still had some epoxy not set up from the deck replacement I replaced about a dozen bungs.


Deck plywood replacement
Sunday July 29 Skip came over to help me. Seems he is having withdrawals from being away from his boat. (W32 Hull #143 Delta Belle) That means I have an extra set of hands to help me! It was nice to have another Westsail 32 owner here on my boat so we could compare notes. So after a bit of talking we got to work. Skip worked on digging out the rest of the rot that was in the openings were the samson posts go. The port side opening was the worst one with the other side being pretty solid. Mind you Skip was digging this rotten wood out with a small pick as that was all we had that would fit in the opening.


Dig, Dig, Dig!


Here is what the holes looked like after Skip was done.
While Skip was doing that I was hand sanding on the teak cap rail near the boomkin trying to get it ready for some cetol. It didn't help that not 30 seconds into hand sanding with a sanding block I dropped it into the drink! So I was just sanding with paper for awhile then switched to the orbital sander. I wrapped the cord around me so if I dropped that it would not end up in Neptune's chest!
I can't thank Skip enough for the help plus I made a new friend! Skip is always welcome here.
Saturday 8-4-12 I went to the boat with the goal of epoxying in some new plywood where Skip dug out. My plan was to fit as big a piece of plywood that I could into the deck. The area I had to replace was small maybe 4 locations that were 5" across and 5" long at the largest. I found that I could not get a big piece in. So like Bud Taplin (Westsail Guru) told me I used small pieces. I ended up making up some epoxy that was as thick as peanut butter and stuffing it into the opening against the good wood then "butter" up a small block and push it end. I feel confident that I was able to fill all the voids with wood and or epoxy. The result is shown below.

Subscribe to:
Posts (Atom)