Monday, October 29, 2012

Engine Removal


What an anxious tense moment. I have been looking forward to and dreading the engine removal at the same time. But as usual everything went off without a hitch.

Last time I picked up some equipment from Bud Taplin (aka Mr. Westsail) I spoke with him about removing the Volvo MD11C engine using the boom to lift the engine out as the boat would still be in the water when I do this. Bud sent me a CD with pictures and instructions on how to properly use the boom so I don’t damage it. So many thanks to Bud!

Before I was able to start I had to change the blocks on the topping fit as they had weathered to an unsafe condition. I didn’t use the topping lift to help remove the motor but it was difficult to raise the boom to get it in position. So new blocks were in order.
 

 The picture below shows how I setup the boom to take the weight of the engine. The engine as far as I can tell from old literature weighs about 505 pounds with the transmission attached. I first wrapped the boom with rope for about 18”. I placed this rope roughly about even with the middle of the cockpit so the motor could be brought straight up. Then placed a 2x2 on top of the rope and tied it to the boom to keep it in place. I wrapped a yellow lifting strap around all this. My come along hook was not big enough to fit in both the strap eyes so I took some chain and wrapped it several times through the eyes and bolted the chain together in two places. The 2 ton come-along attached to this chain. One of the important things to do is to make sure the weight is lifting straight down on the boom. The boom can rotate on the gooseneck. If this happens the weight would be off the wood which helps to spread the load out and all on one point of the boom. It could possibly bend the boom with a single point load.


After the sling was on and the come along connected I took the two halyards (forestay and main) and tied them to the boom about 16” apart from the center of the come along location. I thought I had the boom height enough to be able to swing the engine over the bulwarks but I was about 4” to low. So make sure you measure and then go a bit higher with the boom to allow for some rope stretch.
 In the video it looks like the boom is bending slightly but it did not bend. Deena kept an eye on it and would have said something if it started to bend at all. I also looked at it when we were swinging the motor over to the dock.


My dock mates gathered and we started to slowly winch up the motor. It was quite a bit of weight (505 lbs) but everything keep going fine and before too long the little engine saw some daylight.  The only issue was me not having the boom high enough. So I had to get on the halyard winches and bring the boom up. I was surprised at how much effort it took to raise the boom 4”. I knew the engine was heavy but it was difficult getting the boom up 4”. The halyards were as tight as guitar strings!

After the engine was above the deck level we put some 2x4 on the deck under the engine just in case it fell. That would hopefully protect the deck.  But they were not needed. We swung the engine over to the dock where we had a cart waiting. We lowered the engine down on the cart, blocked it up and wheeled it to the parking lot to be picked up by the salvage guys.  We timed the removal of the engine with high tide as our docks are floating docks. If we did this at low tide the trip up the ramp to the parking lot would have been the hardest part due to the angle of the ramp.   All in all the whole operation took about 40 minutes.


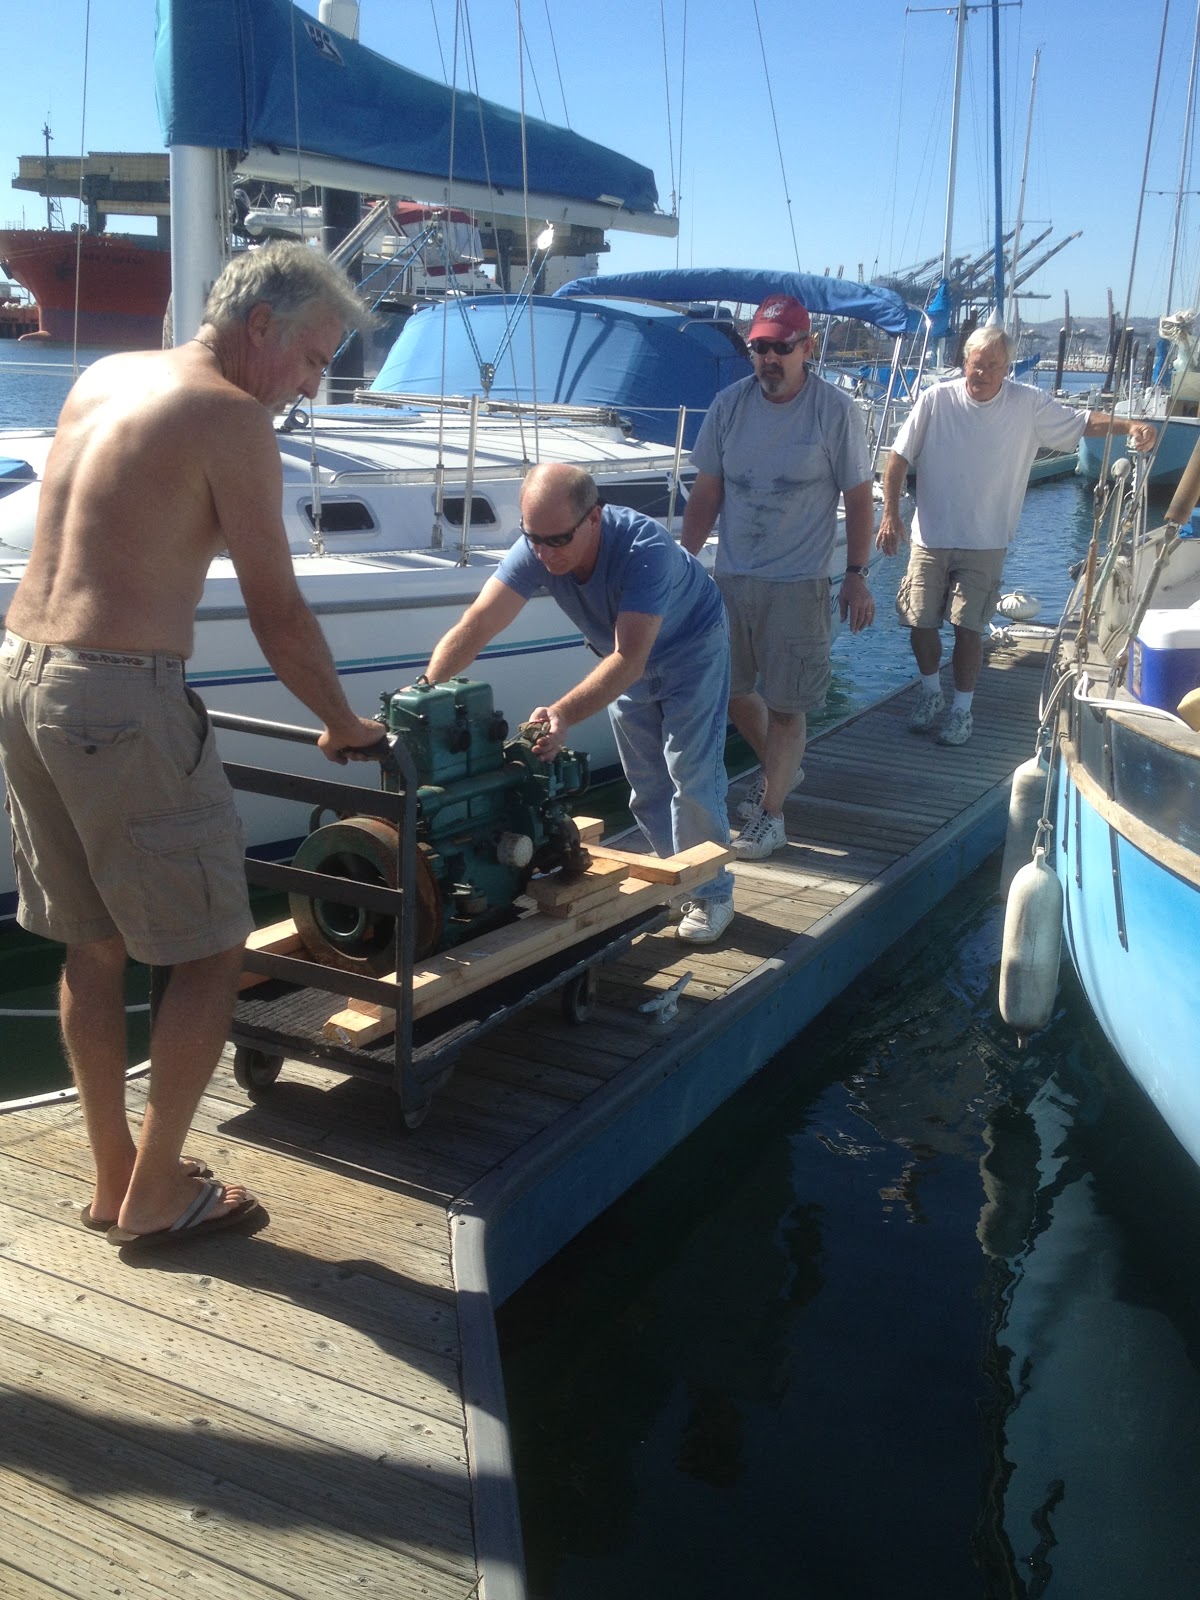
I owe a big thanks to all the people that helped. So thank you very much to Marty, Wes, Dennis, Don and my wife Deena. Marty and Wes had done this before so they guided me through it all.

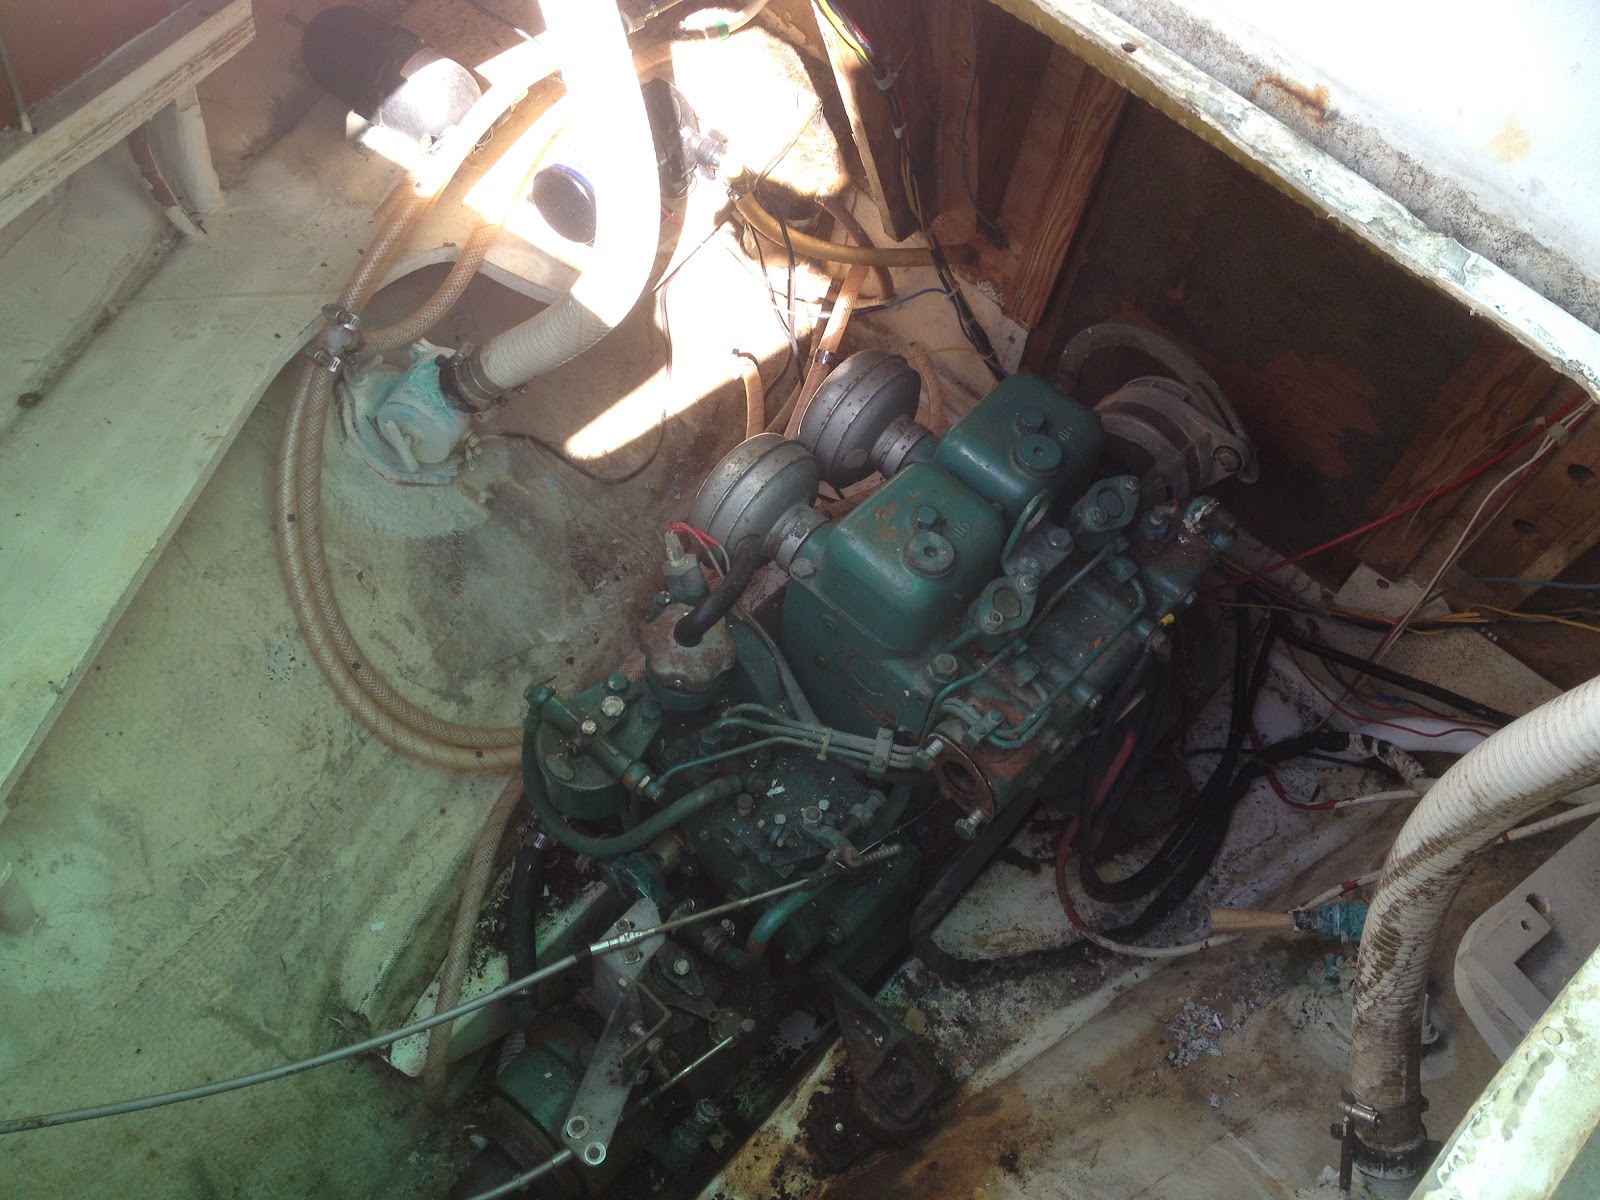
The clean up begins. Here are the before and after pictures of the engine room. We removed the old hoses and all the other stuff so we would have an empty engine room  to start cleaning on. Deena mainly just cleaned the oil, rust and gunk out of there. It stills needs some work, but it it starting to look really nice. Once we get some paint on it it should shine!


When will the new motor go in? I still need to order a few parts for it. I am planning out the engine room so I am in no hurry as I want to utilize the space to the fullest extent. We are planning on putting in new fuel tanks (2), a water maker, fuel polisher, a refrigeration system, batteries and possibility storage area for a Honda generator. So you can see I need to think this out.

Now the engine is out I can move on to the boomkin…..
Did I mention we timed it with the tide?  Look at the ramp angle in the previous ramp picture.
 

Monday, October 22, 2012

Starting the engine removal & restore 12 volt power

Last Friday night I headed down to the boat to work on getting the engine ready to remove. I had done some work on it before but I needed to complete it. I had sprayed some penetrating oil on the shaft coupling a few weeks ago hoping it would help loosed some of the rust. Well it worked I was able to get the shaft coupling separated from the transmission with out ANY cuss words. Yes I have been know to spew a few when I get really mad at objects. (Now you know more about me....now forget that part.)

 I also removed the bolts that held the motor mounts to the fiberglass pan. I just hammered them flush to the fiberglass then used a screw driver as a punch to sent them into the enclosed area between the pan and the hull.  I must say I think that the mount design is a bit light. But hey it worked so who am I to judge?

I t was dark by then so I picked up all the tools and moved inside to try and get the 12 lights to work again and more importantly the bilge pump. I must say that having no power to the bilge pump all week weighed heavy on my mind. I kept thinking of Nellie Jo's sister ship the Delta Belle. (Sorry Skip!). The ground was run through the engine so when I disconnected all the wiring off the engine I lost all the 12 volt power. It was easy enough to find the correct disconnected wire and connect it directly to the battery ground. Now I could sleep better as I had restored all the 12 volt power. I ended up sleeping on the boat. I was just to tired to make the 40 minute trip home.

HOMEWORK
Just so you all don't think I am just sitting at home when I finish my 10 hours at work here is a list of the items I work on at home.
-Bowsprit platform - I have put 3 coats of Cetol light on it and have one coat of gloss clear on it. I have to put at least one more coat before I can call it done. Oh and I sanded and sanded and sanded on it first!
-Forward pulpit I polished it up. I am making new teak mounts for the nav light to mount to on the pulpit.
-Windlass I bought a used one and cracked it open, It was still greased heavily and the seals look to be in good shape. I need to paint it and figure out what to do with the formerly chrome pieces. Oh I did make a new gasket for it.
-Aft pulpit I polished it up. I need to make some backing plates for it out of stainless steel.
-2x4 boomkin cross piece I polished it.
I know there are others but I'm too tired to think of them right now.

Till next time,
James

Sunday, October 7, 2012

V-Berth Paint, Boomkin Inspection and Start of Engine Removal


Today at the boat Deena and I were both busy. Deena sanded down the v-berth platform and part of the hull to prep it for paint. She then vacuumed it down then wiped it down twice to make sure all the dust was removed. She also put a second coat on the chain locker bulkhead.


We are using exterior satin semi gloss enamel Behr Premium Plus Ultra Paint and Primer on the wood and the hull. We will not use it in the bilge area, but everywhere else. The paint really makes a big difference in how it looks!
 
Now that we are done with the bowsprit, except for the platform I am moving on to the boomkin. I use a dental pick to probe the wood of the boomkin. I did find some soft spots so just to be sure I will replace the boomkins The underside of the boomkin had no protection at all. Of all the mast failures I have read about the boomkin failing was fairly common. Keep in mind that the boomkin is 37 years old so I will sleep better if I replace it! I will be replacing the tangs, wire and turnbuckles.
 
 
Engine Replacement
I have to replace the engine and if you look back in the blog you will see that I bought a 40HP Yanmar. Today I started to remove everything out of the engine room in preparation to remove the old Volvo MD11C. Below are some pictures of the engine room before I started to remove everything. I did already remove the wet muffler, 6 gallon water heater and a few of the hoses.


All in all I think the engine room is fairly "clean" as far as not a lot of wiring and miscellaneous junk in it.
I was able to remove the engine mounting bolts to the engine bed, the fresh water pump and all of it's hoses. I looked at the port side fuel tank and it seems to be in good shape. But again it is 37 years old so I will replace it and install a starboard side tank too. 


Friday, October 5, 2012

Well traveled parts...

I was cruising the Westsail Owners Association website a while back and saw that Mike and Carol had a stern pulpit and a 4" boomkin cross piece for sale. I contacted them and ended up buying it from them. Now they live in Oregon and I live in Socal. So shipping these items down would not be cheap.......except they were heading down to Socal in a few weeks and would bring it with them.

A few weeks later we get a call that they are in Oceanside. We make an arrangements to meet them to pick up the items. We head out on a Saturday to meet them and have such a nice time talking to them we all go to supper together. Mike and Carrol have to be some of the nicest people around plus they have great stories to tell.
left to right-Me(James)my wife Deena, Carol and Mike
Here are pictures of the parts I bought. Mike and Carol tell us that these parts have been to the South Pacific! Nice that is where we want to go!  Plus these parts of off their boat which was in the tsunami that came from Japan.

 
Thanks Mike and Carol!

She's a rigger!

Last weekend Deena and I went down to the boat to reinstall all the hardware on the bowsprit, not including the platform. We reinstalled the tangs after taking them home and inspecting them. We put a bead of chalk around the bolt holes on both sides to help keep the water out. We then installed the new whisker stays with new open body turn buckles.  (Don't you love the blue tarp over the boat? It was hot so we threw it up there. The marina has a no tarp policy....but we removed it before we left.)

Deena then installed the stays for the forward sails. These also have new open body turn buckles.

Deena wants to learn as much as possible about the boat in case I get sick or whatever. So far she has been doing really well! Dang I love that girl that loves our boat!