Friday, July 27, 2012

Bowsprit being built by H&L

After much research on building the bowsprit myself or having it built I went with having it built. I had a couple of places give me bids. The best price for a complete bowsprit built out of a single piece of clear Douglas fir was H&L Marine in Rancho Dominguez, Ca. Yesterday I brought them my bowsprit to reproduce. The estimated time to have it built is 10-20 days. This will give me time to get the bow, chain locker and deck core ready for the new bowsprit.

Here is Cesar. He is very helpful and knowledgeable.
I must say I was impressed with H&L Marine. Their shop is HUGH! They have a ton of wood in many species and can do any custom work that you need done besides the stuff they crank out every day.  They have an area where they sell the seconds, which looked pretty good to me. I might be shopping here a bit!

I got there right at closing so I didn't get the full tour but Deena did as I was taking care of the paperwork. She saw lots of impressive woodworking.


Look at all the tillers on the wall to the left. There are more that you can't see in the picture!


Here is about 1/3 of the shop area. You can see the laminating presses on the right.

Thursday, July 26, 2012

Sanding the teak bowsprit platform

I can't say that I have done much work with teak....ok I haven't done any work with teak before. So as I sand on the bowsprit platform I wonder how much do I need to sand. By this I mean between the slats. It has the silver weathering on it, it won't be seen much, so do I need to sand it?  I will be coating the wood with Cetol so do I need every bit sanded? I posted the question on the Westsail Owners Association website. But if you know the answer or have a comment let me know. Below are a few pictures of some of the sanding I did last night. I was told teak is an oilie wood, but wow it is more than I thought! I can feel it on my hands when I dust off the sanding dust. It sure does sand out to a beautiful finish. I can't wait to put some finish on it to see how it looks.


 Do I have to  sand between the slats? Can I leave them weathered?
Look at the difference between the sanded platform and the weathered platform. A big difference!

To the left is a shot of the stainless steel all thread rod that goes through the platform. You can see I cleaned up the lower shorter piece. I used a stainless steel brush on it. I ended up chucking the rod in my drill press and just held the brush up to it as the rod spun around. It worked nice! I also chased the threads for the first few inches on each end just in case. 

Wednesday, July 25, 2012

Bowsprit Cont. 7-24-12

Last night I worked on the bowsprit in my garage again. I had tried to get the stainless steel fitting off the end last week without success. Last week I used a rubber mallet. Last night I used a small maul. It appears all I needed was a bigger hammer! It was a tight fit but it slowly gave way.


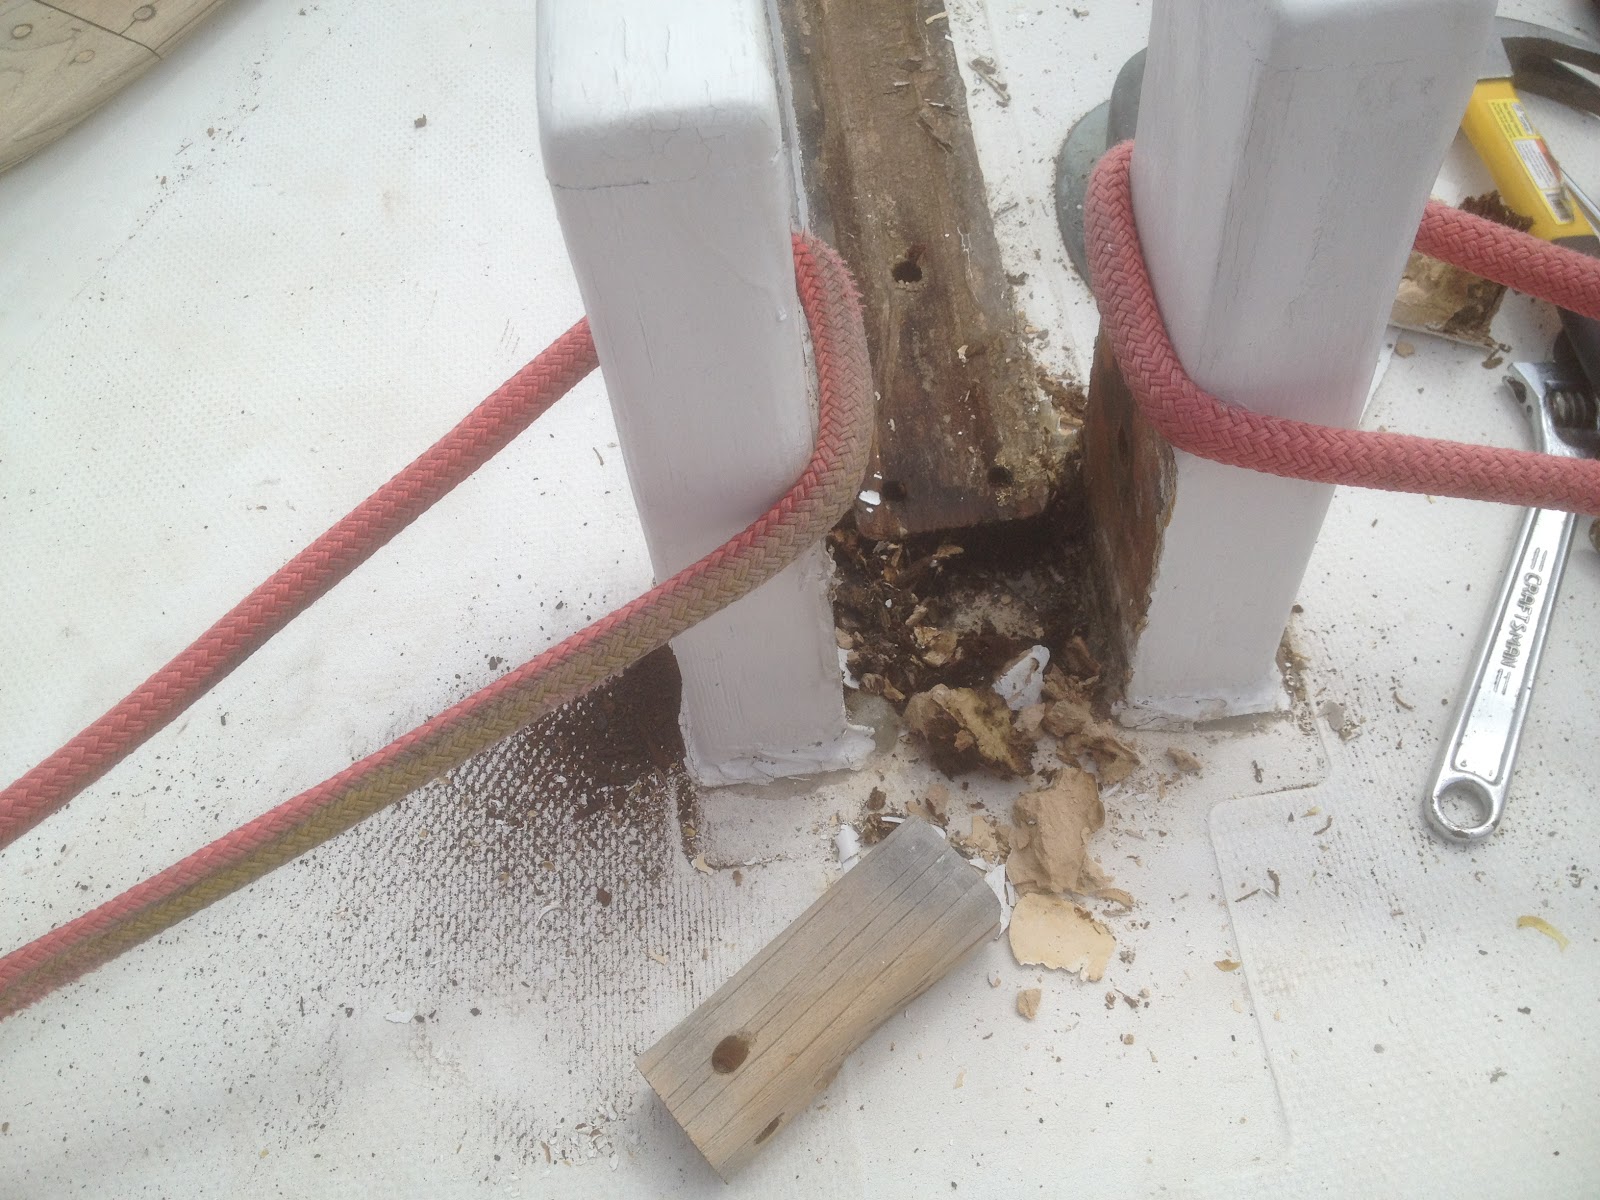
All in all the wood was in good shape. Not that it really matters as the other end is rotten. Look at the picture above. See the glue joint....yeah well it is a joint with no glue, at least not now.


With that done I picked up the sanders and started on the teak platform. I want to sand the teak down just enough to get the silver off. Here is what it looked like when I stopped last night.

Of course the left side was the side I was sanding and the right is the untouched side.

I am in the process of getting estimates to have my bowsprit made. If it is reasonable I'll go that route. If not I will make it myself. The platform I can refurbish with out much time investment, so I will do that part.

I am thinking that I might have enough good wood left from the original bowsprit I might be able to make a boom cradle...which the boat is missing. We'll see!

Monday, July 16, 2012

Bowsprit Removal

Bowsprit Removal
When we bought the boat we could see the bowsprit was de-laminating and would need some work. Last weekend I removed the bowsprit. The removal was fairly easy. I used the two forward halyards to stabilize the mast I tied them to the forward stanchions for the time being. All the bolts came out without much problem. But what I found was a bit disturbing to say the least. The middle bronze bolt that goes thru the deck came out wet. Ah-Oh that's never good. I knew the bowsprit had a little rot in the very aft end of it but to pull out a wet bolt? Any way when the time came for the actual removal a few of the marina locals came to help. So I have to say thanks to Wes, John and Marty. Marty walked me through it all as he has removed his bowsprit on his Hans Christian 43. But his weighs WAY more than mine! Once it was removed we could see more rot on the bottom side.
While I was there I went ahead and pulled both the Samson posts because I new the port side one had some rot also. The starboard side looked good. But the chain locker bulk head had some rot also. Again I knew this as it was easy to see from the vee-berth.

The middle bolt was wet coming out....

Some of the rot left behind when the bowsprit was removed

The all thread on the left is stainless steel. It is the rod that goes through the Samson posts and the bowsprit. Looks like it is about half way gone in one spot!

The lower Samson post is the port side. See the rot just below the paint.
Miss Mae the wiener dog supervisor doing cabin check.

Here is the chain locker bulk head. All this was rot. But it does not go beyond what you see. So I might be able to replace just the rotten part or just patch over it. I'll have to look at it closer to see what is the best way to repair it. I might end up replacing the whole bulk head. We'll see.
An overall view
Port side Samson post opening in the deck. The core is mushy so I will dig it out and replace it with epoxy. The starboard side is still solid. But I will at least coat it with epoxy.
Doesn't look to bad....right...
 I brought the bowsprit home and started to disassemble it. I noticed that it was made with 3 pieces of mahogany. I took the pulpit off and then the teak platform. The bolts for the platform were all in good shape and came out without too much trouble. The stay sail eye bolt had been broken off  with nothing sticking through the bottom of the bowsprit. I removed the eye bolt and found it to be galvanized and not stainless. The anchor roller came off with out any grief. But the stainless fitting at the end of the bowsprit does not want to come off. I was hitting it with a rubber hammer trying to get it to move when all of the sudden the middle piece of wood at the aft end fell off. It broke where the middle bronze bolt was wet. The wood was wet and musty smelling. This thing could have broke in half if I tried to sail it. Good thing I didn't!
Aft end of bowsprit where the through bolt goes.
SNAP...or really mush! This is where the middle board just broke while trying to take off the stainless cap on the other end. I'm not sure broke is the right word as it was really soft at the break.

I'm thinking that stainless steel plates should go where the three through bolts go. This would help spread the load across all three pieces of wood. I might end up making the bowsprit all one piece of fir if I can get one.

Treasure!

While digging through the salon settee storage I found 150 pounds of ingot silver bars! Look at the picture below I took of one of them.


OK its not silver, just lead free electronic solder, bars and bars of them. I think the previous owner is in the electronic industry. Why he stash them I have no idea! Thank goodness someone took all 150lbs from me.

The Engine

A few words about the engine. We knew that the transmission would not shift into reverse per the previous owner. Once I dug into trying to figure out what was wrong...I found out. It appears the transmission was run dry of oil. So the outcome is not good. I put in some oil and found that it all drained out by the next day. There is factory installed drain pan in the boat to keep oil out of the bilge. So no oil went down there! The engine ran during the survey, but come to find out there was no oil in that either. The wet muffler bottom had rusted out so we could not run it long. So we are now saving up for a new engine and transmission. If you care to donate toward that just let me know! The engine is a Volvo MD11B, it is a two cylinder 25HP. The parts for Volvo's is so expensive it is not worth rebuilding. Plus 25 horses for a near 20,000 lb boat is a bit on the lite side! I will remove the engine and try and sell it or at least parts from it. It is a shame about the motor as it only has 45 hours on it. This poor boat was just plain neglected all the way around. But those days are over for her!

Looking aft from the salon into the engine room.
Here is the transmission and the clean aft bilge.
Here is the main way to get into the engine room. Remove the cockpit floor....but it is heavy!

Teak Time!

I was really surprised how well the teak cleaned up. We used the West Marine two part cleaner. It worked really well! Soon we will used Sikkens Cetol to help preserve the teak. Then use the gloss over that to make it shine. Yes we have heard how much work it is. But we like the look of it and will go with that. It we find it is too much maintenance than we will try something else! Time will tell.
Life is good! In southern California with a sailboat, great weather and a beautiful blond scrubbing the boat!

Gelcoat cleaning

Here is a comparison of  the topside before and after cleaning with just saltwater and a stiff brush. As you can see the topside had not been scrubbed for sometime. The chaulk buildup was crazy. In time I will buff out the topside and wax it. But for now just being clean will do.
This is just wiping the hull down with a wet rag and letting it dry.
This is how it looked after a saltwater bath and a stiff brush.
While I was cleaning the outside Deena was inside scrubbing away all the years of grime.


Boat moving time

We looked at several Marinas to keep the boat and decided on Lighthouse Yacht Landing in Wilmington. The boat was in Cabrillo Marina in San Pedro. So we had to move the boat a total of about 5 miles. Since the boats motor and transmission are not working we hired Vessel Assist to tow the boat to its new marina. July 2, 2012 was moving day. Vessel Assist showed up and had us pull the boat out of the slip next to their boat. They sided tied to Nellie Jo and away we went. I have to thank Todd and Jim, my neighbors at Cabrillo for helping me pull the boat out of the slip.  Here are some pictures of the journey. The whole trip took about 45 minutes and there were no issues. I stayed on the boat while underway and looked for any leaks that might happen while under way. I found none, but that is what I expected.

Here is the USS Iowa  in its new home.


Dreaming of sailing....without vessel assist!
WE had a few welcome signs waiting for us at the new marina! Plus a welcoming committee!
Yeah they left the "s" off but all the others ones were correct!

Friday, July 6, 2012

In the beginning

In June of this year my wife (Deena) and I purchased a 1975 Westsail 32 hull . She was named Misty Blue and was in a state of disrepair and generally just neglected. We have named her Nellie Jo in honor of my mother.
Deena and I are planning to take off and sail into our retirement in about five years. So this blog will document the refitting of Nellie Jo. So follow along with us as we chase our dream!

Here is the way we found Misty Blue. She was really dirty, looked like a homeless boat and was just sad looking. But Deena and I had looked at a lot of boats in the last year and a half and could see the potential. We made an offer and the owner accepted it. A couple of weeks later she was ours! What really sold us was the pink three wheeled bike, ratty sail covers and brown tarp over the cockpit!


Here are a couple of shots of the interior as we found her. You can see the galley area wood is bleached out, but is solid.