Monday, January 16, 2023

Fuel tanks coming along

This is an old entry that wasn't finished. I went ahead and finished it so you can see how I did my tanks.

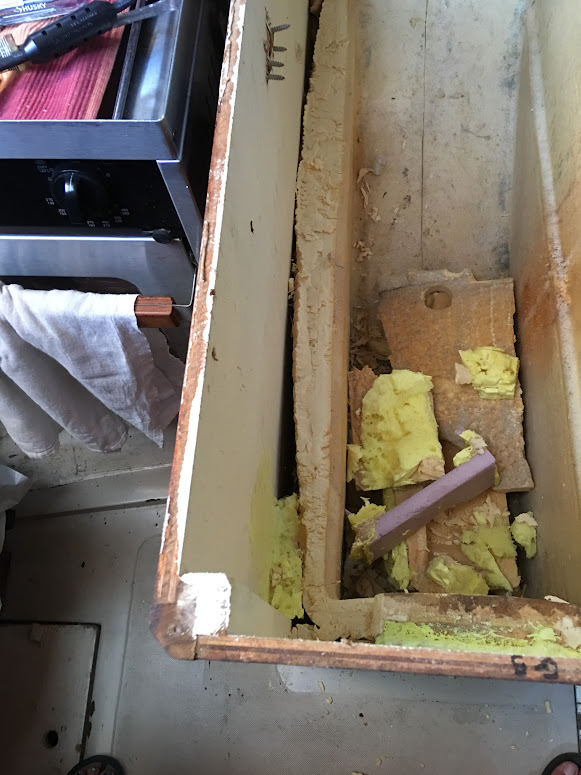
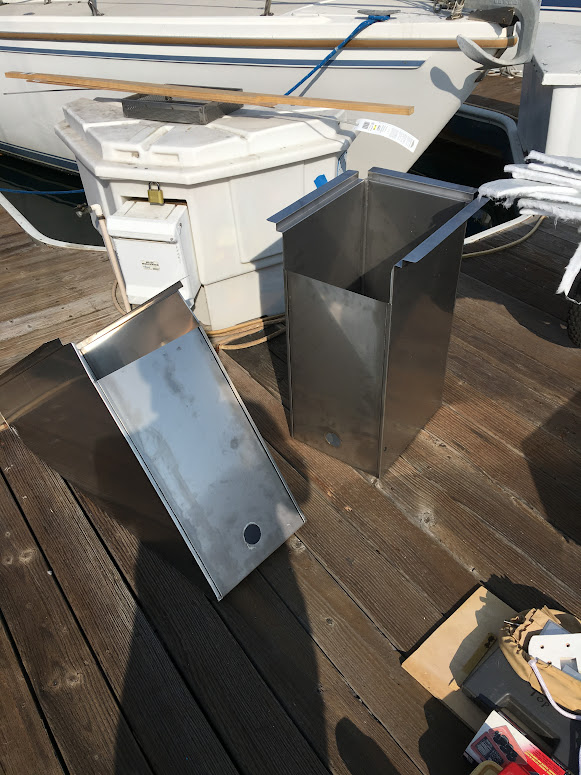
The tanks are welded up and at my house now. Before the tanks were being welded I ordered some flush bungs so I could have the shop weld those in. The bungs are threaded  disks that get welded onto the tank that allows me to thread valves and such to the tank. Well they where on back order without my knowledge. After a week of waiting I made the decision to have the shop weld iron couplings on to the tank instead of the bungs. I did try calling the "bung" company and emailing them but I could not get a response.....so much for customer service. The bungs showed up about a week after I took the tanks home. I tried calling again and was able to speak to a person who said I could return them for a refund. I'm a little leery of doing that...I'll be out the bungs and the money. (Update - the company refunded my money! Yeah!)

First things first...I need to test the tanks for leaks. The leaks are where you see bubbles.


Yup I found a few. But no worries I have a mig welder and can weld!


I leak tested them and found a few leaks. 

I re-welded the tanks where the leaks where. I then ground down all the welds a bit to knock off the high spots. Then I tested for leaks again and found none. The way I test for leaks is to plug all the openings except two. One of the opening gets a pressure gauge that reads lower pressure. The other gets a valve that I can pump air into with a compressor. I only put 3-5 psi in the tanks then spray them with a water /soap solution on all the fittings, seams and welds. I look for bubbles and that tells me where I have a leak. Once I get all the leaks fixed I pump the tank up to 3-5psi of air and wait 24 hours to see if the pressure has leaked down any. If not then it is good to go.

24 hours later....
The pressure held so the tanks are good to install. Before I can install them I have decided to paint them bright red to pretty them up. I had dressed the welds up before I tested them but they were still a little less than perfect looking. I used some long strand fiberglass on all the welds and faired it in with the tank body. (I took a year and a half of auto body classes a few years ago.) I then sanded everything smooth, primed the tanks then painted them with red rustoleum paint. I put two coats or primer and three coats of paint.

For the pick up tubes I could not find anything that I liked so I decided to make my own. I used 1/4" soft copper tubing and soldered it into a reducing nipple. I created a flare on the copper so it would fit snug in the nipple. I then soldered it in on both sides of the nipple. On the end in the tank I cut a bevel and made the tube so it would be about a 1/2" above the bottom of the tank. 
Just a note...I did put a bung in the bottom of the tank with a valve. I did this for two reasons. First I figured if and when I get water in my tanks I can drain them. Second if for some reason the pick up tubes failed I could feed the engine from the bottom valve. I also put a plug in the valve in case the valve was accidently opened.

Wednesday, November 1, 2017

A LONG NEEDED HAUL OUT

The whole time we were working on the boat getting it ready for cruising we knew it needed a bottom job. We decided to wait until we were in Mexico to get the work done. We also knew the original thru hulls would need replacing.

Once in La Paz we contacted Marina Del Palmar to get a quote.  Tom at Cruiser's Supply recommended them to us plus other cruiser's spoke well of them. We  made a haul out date of November 28, 2016.

I knew Nellie Jo had very little paint on her and had sat for 18 years in her slip before we bought here. So she had about 22 years of never being hauled out. I kept pushing that thought to the back of my mind as the date grew closer. I had visions of hundreds of blisters and all kind of bottom issues. I also knew Bud (Bud Taplin the godfather of Westsails.) said our boat was built before the oil shortage in the 70's so I should have no issues. I also had a diver do a bottom inspection before we bought the boat. I took a gamble hoping for the best.

November 28 2016 shows up and we motor to the boatyard to haul her out. We pulled straight in to the slings only to be told we need to back in. Nope...not gonna happen. I can not back Nellie Jo up straight in a big area much less with large expensive power boats within ramming distance. But no issue the yard grabbed some lines and spun Nellie Jo around like they do it every day. (OK they do do it every day.)
Here is Nellie Jo the first time out of the water in 22 years!

So now we are in the slings and being lifted up. Deena and I were still on the boat as they hauled us out of the water and drove us to our spot. I don't think they do that in the states...

Once she was settled in and they put a ladder up for us we disembarked to see just how bad the hull was. This was the first time we had seen Nellie Jo out of the water! To my surprise she looked well. There was very little paint left on her so most of the gel-coat was showing. There was little grow on the hull as we have here scrubbed about every four weeks. I looked hard after the power wash and could not see one blister! Yeah I was so happy!

Removing what was left of the bottom paint.
We had the hull sanded down and 3 coats of epoxy barrier coat put on followed by two coats of hard red colored 67% copper paint. But before all the epoxy and paint we had two thru hulls removed and one 1 1/2" thru hull down sized to 1". All the remaining thru hulls were changed to Marlon with Marlon valves.

Hull sanded down and getting ready for 3 coats of epoxy primer
               
                       
Primer coats on.

Hard 67% copper anti fouling paint on.

The topside of the boat was wet sanded and polished out as the gelcoat was faded. As a side note when we bought the boat we thought it was a white hull. It was so oxidized it looked white. Check out the picture of when I first started to wash it.)

Nellie Jo (then Misty Blue)  with the beginning of a hull wash when we first bought her. We thought the hull was white!

With the color sanding, polishing and waxing Nellie Jo was looking like she was new! She was shinning and we were very pleased with the work.
 With as old as the gel-coat is we will probably have to paint the  topside next time we haul out for bottom job. She is 42 years old!

The original gel-coat was wet sanded then buffed out. Look you can see our reflection!

While in the yard we had them install a manual black water whale pump and change the elbow at the thru hull to a full radius elbow. Before the tank was gravity feed and had a short radius elbow. This set up caused me to have to jump in the water with a stiff thick wire and shove it in the thru hull as the poop would always get stuck at the elbow. I did not enjoy this set up at all! I would have to be decontaminated after "poop diving"! YUCK!!
Aww but no more, With the manual pump and new elbow it is a really easy set up now and I don't have to  do poop diving any more!

Here are some more miscellaneous pictures of her on the hard.


Tuesday, June 6, 2017

LIVING THE DREAM

This is not a vacation....this is our LIFE!

I have some catching up to do on the blog due to the relaxed life I live now. I never thought I would say that and MEAN it!
  So just as a teaser.... we survived the Baja HAHA and have been sailing in the Sea Of Cortez. Nellie Jo was hauled out and had a long needed bottom job done, plus a few other items taken care of while she was out of the water. We have met some incredible people that will be life long friends.

Right now we are back in the states to take care of family stuff and finish getting rid of our storage locker. I miss the boat already...

Here are some of the pictures we took......enjoy


We made a new 120 panel

Freddie becomes our new crew!

Deena and Freddie the kayaker.


Sea Caves

Westsail 32 Idle Dreams with Nellie Jo in the background.

Before

After

SV Striker is the second boat up from the bottom.

Safety First.....or after a few drinks on SV/Little Haste

Nellie Jo and Idle Dreams


Monday, September 12, 2016

Progress on the freezer and refrigerator

Deena and I decided that we should go ahead and re-insulate the original icebox to make a proper freezer and refrigerator out of it. We installed a Cool Blue cold plate unit in it a year or so ago and it has worked great. But with us heading down to Cabo San Lucas and the Sea of Cortez we knew we needed to replace the insulation with something that has more R valve than the insulation that was installed in 1975. We knew it would be a big project and would take some time but we were up for the challenge. I had hoped to be able to save the fiberglass insert but soon figured out that I would not be able to without having to tear out some of the cabinets. We did not want to do that so we decided we would make a new insert out of fiberglass ourselves.....that soon changed.

I had to remove the copper lines.
The cold plate was mounted on the settee side of the icebox. This caused condensation on the outside of the icebox.
This is the original icebox with the divider I put in when we installed the Cool Blue refrigeration unit.
Cutting with a Fein tool.
The start of removing the liner. It was harder to remove than I thought it would be.


Starting to make progress!

   
You can see the foam was not really in all the cracks.


Finally removed the liner and was able to see exactly how the insulation was on the bottom. Not much and just a mish mash of foam pieces.

Here Deena is cleaning out the icebox shell. There was mold on the foam and it was wet.

All painted and clean. We tagged the hull so it would be a surprise for the next owners. You can see I made templates of the sides to see exactly how big I could make the new liner and still get 2.5"- 3" of insulation in.

 
More patterns for the two drop in boxes. I would leave 1" space between them for insulation to go between the frig and freezer.

The insulation I used was 10 mm Spaceloft and it has a radiant barrier on it. It is rated about R4 for the 10mm (3/8") thickness. I needed to get the highest R value I could in the 2 1/2"- 3" of space available. With 3" I can get R32...so I was shooting for 3" of space with the new liner. Just a side note that the insulation is dusty and it gets everywhere. It does not itch but it does dry out your skin and feels "sticky" but it isn't. It is hydrophobic so it does not absorb water. After a day of working with it water would literally run off my hands under the faucet. It does not itch so that is a big plus! A big thank you to the guys who got the insulation for me....you know who you are!

The roll of spaceloft. (248 sq feet)
 
Here I am laying out patterns and cutting the insulation.

I ended up with 7 layers on the three sides. 9 layers on the hull and bottom.
   
We were planning on building a fiberglass liner to go in the box. But I could not build a support system for it and get the space I needed for the liner and keep the box the same dimension inside as it was. So Deena suggested we do it in stainless steel. It would look better and be easier to clean. So stainless steel it would be.

I drew up the two liners and PPC, the company I used to work for made the stainless steel liners for me. They did a great job and everything fit as planned. I must say it was difficult getting the liners in as it was a very tight fit. At one point I was standing in the frig liner getting it to fully insert to the bottom insulation. Thank you PPC for the liners and other items you made for the boat. I really appreciate it!


The liners before they were installed. The one on the left is the freezer section and goes near the hull.
 
A minor modification was needed and I sealed all the seams with aluminum tape just in case.

The liners in place and ready to trim out. You can see all the cloth Deena put up to try and keep the dust from the insulation off of everything.....nice try....we still are cleaning dust from some places!
 
I installed the cold plate on the bottom this time. There is over R32 below it and it gives us more room.

I ran 12 volts to the frig section shown here and 12 volts to the freezer also. We had a small battery fan in the frig before that helped keep the temps pretty even through out the refrigerator section. I figured I would run a small 12 volt computer muffin fan instead of replacing batteries every two months.
 On the lids I used 3" of urethane foam  glued to the plywood. I then covered the under side of the lid and foam with fiberglass cloth with epoxy. Then they received 2 coats of white paint.

I decided to use 3" of urethane foam for the lids. I cut lids out of plywood then sealed them with epoxy.
  
We thought were were going to go back to wood tops for the lids.  Deena saw some glass accent tiles in Home Depot and bought a couple to see how they would look. We thought they would look very nice and be more functional than wood as she could set hot pans on them if needed. We decided we would trim the tops of the lids out with wood and put the tile in the middle. I re-used some handles we had. We mounted them on the lids then laid out the tile.
  
The freezer door is on the left. You can see the handles in the location they would be mounted. 

You can see the tile laid out on the removable door behind the stove. We made this door larger than it was before for ease of getting the pots and pans out that are stored back there. We were getting excited about the tile as just this little bit laid out looked promising!

Deena laid out the tile ahead of time so once we laid the adhesive down we could just lay them in.
 
All the doors grouted but not yet cleaned.
The finished product turned out much better than we thought it would. We knew it would look nice but WOW it looks REALLY good. Not too bad for our first tile job! Check it out below.


In the picture above you can see one of the two baskets that sit on shelves in the frig.
All in all a great job if I say so myself!

Tuesday, August 2, 2016

Baja Ha Ha and Alado Roller Fullers

We received the official notice that we are in the Baja Ha Ha! We are so excited to be going. If you don't know what the Baja Ha Ha you can click on the name and follow the link to read about it. Basically it is a rally of sailboats that meet in San Diego and then sail down to Cabo San Lucas in about 12 days with two stops along the way. At last count there were 103 boats heading down. The Rally is October 30 thru November 12. We can't wait!

We are in contact with Steve and Sherri Brenner on SV Pablo down in Mexico. They have a Westsail 32 just like ours. We have been following them on Facebook since before they did the Ha Ha last year. We have been asking lots of questions as they are the "Pros" now!

Our good friend Rob will be going with us for the trip down to Cabo. He is a sailboat racer and can teach us a lot so we are pleased he said yes when we asked him to join us. I think this trip was on his bucket list so it is as special to him as it is to us. Thanks for joining us Rob!


Recently we installed our Aldo Roller furlers. The process was simple and easy. I think they will serve us well. I installed them on the two head sails. This will allow us to deploy the sails, reef or store them all from the cockpit. It will be safer that way.


We ordered a kit from Sailrite to change the sails from hank on to furler. Now we can roll the sail around the wire in order to store them or to deploy them. It makes it so much easier than having to get out on the bowsprit in heavy weather. (I know this first hand!)

We have  a lot of projects going on so stay tuned as we prepare for our Sail away date of October 30!

Oh and Deena says I need to change the background to something brighter. So watch out for a different color scheme!


Tuesday, January 5, 2016

Fabricating a wet exhaust system

This is an older write up that was never published.

Being the frugal (cheap) guy that I am and that I like to build things I decided I would say some money and build my own wet exhaust. (Just so you know if I feel I can't make something that is equal to or better as far as being safe...I'll spend the money and buy the part.) What is a wet exhaust you say? Well it is simple, like a car the boat has an engine that has exhaust. To get the exhaust out of the engine room you run some exhaust pipe to the back of the boat like you do a car. But the exhaust is really hot. So hot it could set the boat on fire. Yea not a good thing. So you "inject " water into the exhaust and it cools it down so you don't get a flaming sailboat...the best kind...not on fire! There is more to it than that but that is the basic idea.
Yanmar wants $350- $500 for the pieces for the wet exhaust elbow. The wet elbow is the expensive part of the wet exhaust system. I'll make that part. The rest of the system will be off the shelf from Home Depot using 2" galvanized pipe. So here goes.

This is from the Yanmar catalog.  Assembly #4 is what I will be making. The the other items will be bought from Home Depot. FYI item #7 will be a regular elbow then a "T" below that to "inject" the water....you'll see.


This is the exhaust port on the engine. It is the back of the heat exchanger.

 
I need to make a template of the exhaust port so I take heavy paper, tape it on and lightly tap with a hammer, end of a chisel, etc to "cut" the paper on the edges of the exhaust port.


Here is the finished template.
 
I purchased a 1/4" plate 3" wide and 36" long as scrap from a metal supply house. I choose 3" wide so I only had to make a single cut as the total side for this part is 3"x3". I am make two so that is why I have two in the picture. I laid the template I made over these two pieces and marked the opening I need to cut/drill. You can see I already rounded the corners of the plate.
 
Here I am drilling the holes for the bolts. 
 
 
Now the test fit for the bolt holes.

 I don't have a picture of it but to cut the large middle hole I drilled a series of smaller holes near the edge of it and then cut it with a jig saw.
 
Here is a 2" x4" galvanized nipple that I cut in two. I know some of you will say not to use galvanized piping on the exhaust due to the galvanizing out gassing when heated and making me sick. Well the galvanizing has to be really  hot like welding hot to give off gases that make you sick. I have actually seen this happen to some welders I worked with. I'm in the sheet metal trade so we deal with welding galvanized stuff all the time. Some don't take the proper precautions...the first time...LOL. They do after that!  FYI, drink milk and it will make make the illness go away.
 
Here is a test fit of the nipple mocked up on the plate to check for clearance.
 
 
 And wa-la the nipple is welded on the plate. I did grind the galvanizing off the nipple. It makes for a better weld and I keep from getting sick!


Here is the back side. I didn't get as pretty as a weld on this side but it will work. The 2" nipple is actually bigger than the exhaust opening but I went ahead and smoothed the weld over for better air flow.  I had actually spaced the nipple about 1/2 way into the plate and welded it there. This gave me a good place to weld on this backside without building up too much to grind off.


 Since I was fabricating stuff I went ahead and bought a sheet of exhaust gasket material. I made several gaskets as the cost for one was about $14. Now I can make many for only $8! 
Here is a picture of the material I used.
 
As I said before I am making two sets of wet elbows so I can carry a spare when we are out sailing the world. These things do rust out so I'll be prepared when it falls apart from rust!

So I wrote about the west exhaust awhile ago. The wet exhaust has worked great. I  wrapped the whole thing with header wrap I bought from NAPA. The header wrap will help me keep my skin. It insulated the hot metal exhaust from my arms because sure as water is wet I would burn myself if I didn't insulate it. I have found now that I have had it installed for awhile that the header wrap is really itchy. I found I have to lay across the engine from time to time working on the engine of the forward part of the engine room. So I think I will sew a cloth cover out of scrap sunbrella that I have to go over the header wrap. That should stop all the itchiness and should not catch fire as the insulation gets warm but not hot.

When I get back in the engine room I will take a few pictures to show the final installation.