Today at the boat Deena and I were both busy. Deena sanded down the v-berth platform and part of the hull to prep it for paint. She then vacuumed it down then wiped it down twice to make sure all the dust was removed. She also put a second coat on the chain locker bulkhead.


We are using exterior satin semi gloss enamel Behr Premium Plus Ultra Paint and Primer on the wood and the hull. We will not use it in the bilge area, but everywhere else. The paint really makes a big difference in how it looks!
Now that we are done with the bowsprit, except for the platform I am moving on to the boomkin. I use a dental pick to probe the wood of the boomkin. I did find some soft spots so just to be sure I will replace the boomkins The underside of the boomkin had no protection at all. Of all the mast failures I have read about the boomkin failing was fairly common. Keep in mind that the boomkin is 37 years old so I will sleep better if I replace it! I will be replacing the tangs, wire and turnbuckles.

Engine Replacement
I have to replace the engine and if you look back in the blog you will see that I bought a 40HP Yanmar. Today I started to remove everything out of the engine room in preparation to remove the old Volvo MD11C. Below are some pictures of the engine room before I started to remove everything. I did already remove the wet muffler, 6 gallon water heater and a few of the hoses.

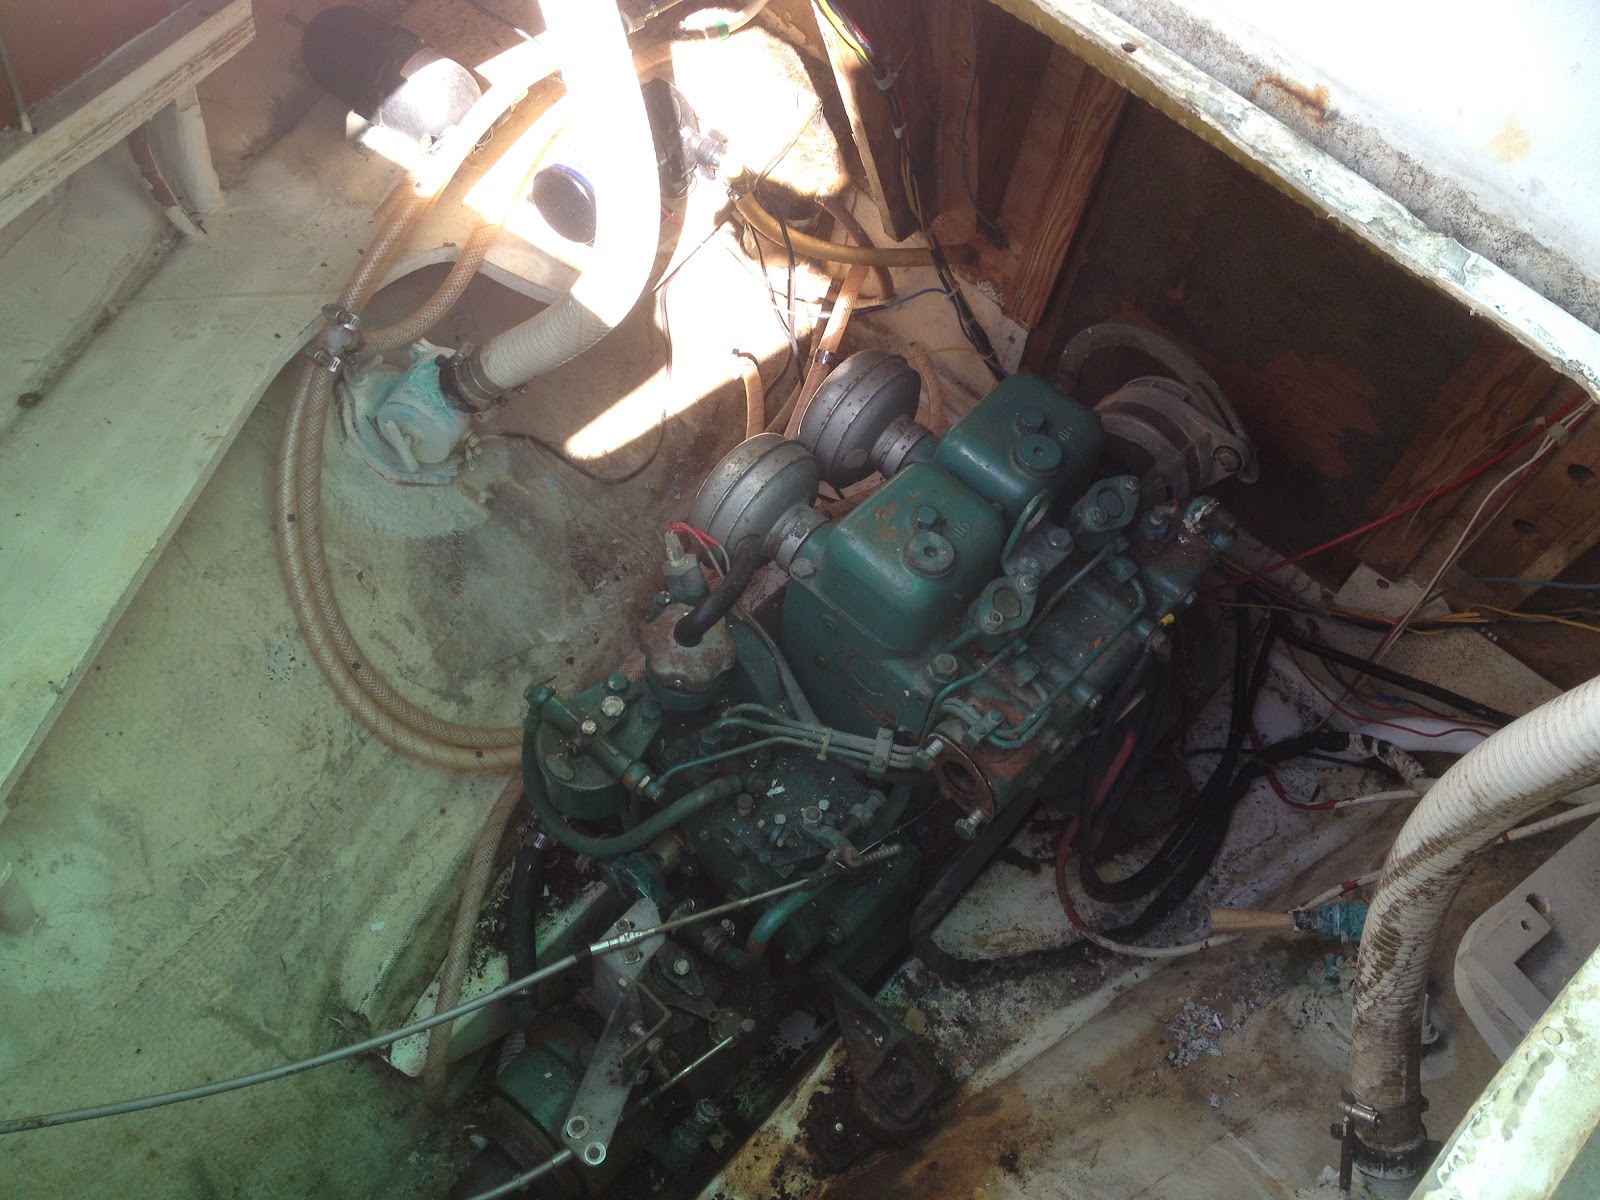


All in all I think the engine room is fairly "clean" as far as not a lot of wiring and miscellaneous junk in it.
I was able to remove the engine mounting bolts to the engine bed, the fresh water pump and all of it's hoses. I looked at the port side fuel tank and it seems to be in good shape. But again it is 37 years old so I will replace it and install a starboard side tank too.
You're in great shape. Our engine room was pretty darn bad compared to that when we started !
ReplyDeleteTate
These are familiar photos! lol. I love how that paint came out. Did you use a primer? I am so looking forward to painting the cabinets with something other than bilgekote. Thanks for recommending the exterior enamel.
ReplyDeleteLOL, Actually Tate I was thinking back of your engine compartment when I wrote that! It looked like you had a mess!
ReplyDeleteDani,I did not use primer, the paint has primer in it and the paint is really thick. I think it will hold up. In reality we will be insulating the hull from the water line up and the underside of the deck. Everything I have read and talked to cruiser the insulation will make a big difference in comfort. I will be doing a separate post on that. We will use 1/2" Armacell. We use the stuff here at work and they make a marine version.
How did the finish turn out on the anchor locker? Did you sand anything before painting, and what color white is that?
ReplyDeleteI am considering painting some of the cabin sides around the portlights with the Behr paint and am curious if you think it would look nice in a highly visible area and if you sanded.
Thanks!
Dani,
ReplyDeleteI still have to put the final coat on. But I don't see it not finishing out nicely. The prep work is the key. I wiped the wood down with acetone, but TSP would work also. (I had the acetone there at the time.) Then sanded it with 220 grit. I would try to use a roller as much as possible. If you can remove the panels then it will come out nicer, easier. I would see if you have a place you can practice on….maybe the inside of a cabinet.
As far as color it is the base white semi gloss. It required no tint. The can is on the boat. But if you need I can get it later.
I will be installing bead board for the salon ceiling and I will paint it the same color. I think the color is right to help open up the space. Just seeing what it did to the v berth makes a big difference. I will be installing all the v-berth access panel this weekend so I will take a picture so you can see the whole thing in white. Of course the "floor" of the v-berth will be covered up with a mattress when the time comes. So most of the paint will be covered up.
We are focusing on getting Nellie Jo sailable before we really dig into the interior. When I did the bowsprit the rot there continued to the v berth, thus the work on the v berth.
Thanks a bunch! In your post you have satin finish, but I am assuming you meant semi gloss. I am going to jump in and paint one area around the port light behind in the hanging locker this Friday afternoon for a test. I am hoping the result is good so I can continue and paint around all of the portlights.
DeleteOpps your right is its semi gloss, time to edit that. Thanks.
ReplyDeleteTake some pictures I'd like to see how it looks. I am trying to convince Deena to put more white in the salon. She loves all the wood color!
I will defnitely post pictures. I plan to paint the wood around the portlights after epoxying under some of the port light due to water damage, then sanding and applying epoxy primer, then paint. We'll also do this in other places like around the dinette where water has damaged the veneer.
DeleteI went to the store and actually got the color "Polar Bear". It's just a tiny bit more muted than the "Ultra Pure White" that comes off the shelf. I have worked with Ultra Pure White on house trim, and it's just a little to stark for my taste. I'm really hoping the Polar Bear color works perfect.
On the wood I'm planning to wash with TSP. Let dry then mouse sand 220 grit over the area. Let dry then paint one coat of the Behr paint. The instructions say to let the paint dry 12-16 hours on stained wood, so it will be a slow process, but I have high hopes 3 coats will give a perfect finish and make the boat a hell of alot brighter.
As a sides note. I am also about to refinish our smurf blue formica counter with Giani Granite paint. Although I am skipping the 3 colors and instead opting for 1 color to reduce pattern in the boat. Pattern in such a small space is just too much. But the Giani paint looks like and easy and cheap ($60) fix to the formica.
Tate says he has read many many people having issues with redoing the formica. I'll post pics of that too. It will be in Inca Gold http://www.gianigranite.com/AIncaGoldcountertoppaint.html
Danni, I'm older than you....the Inca gold color is harvest gold! Ask your mom she will get it! LOL, The 70's return!
ReplyDeleteI'm looking forward to seeing how all the painting looks. I might follow your lead.