Tuesday, February 19, 2013

Rudder cheeks and boomkin installed!

Finally, I was able to get the rudder cheeks and boomkin installed. It seemed like a long time to get this task completed. Now I just need to pull a few chain plates and see how they look. Then that will complete the standing rigging system for now. I plan on changing out all the standing rigging cables in a few years. I will inspect them all just in case..

I did replace the boomkin tangs, stays (cables) and turn buckles as you will see below.


The easy bolts first.

My best view!

Too long in this position and the ice tea wants to come back up!

Just a nice picture with palm trees in the background.

Gratuitous wiener dog pictures for Nancy! Miss Mae enjoying the sun.

And when she gets too warm.

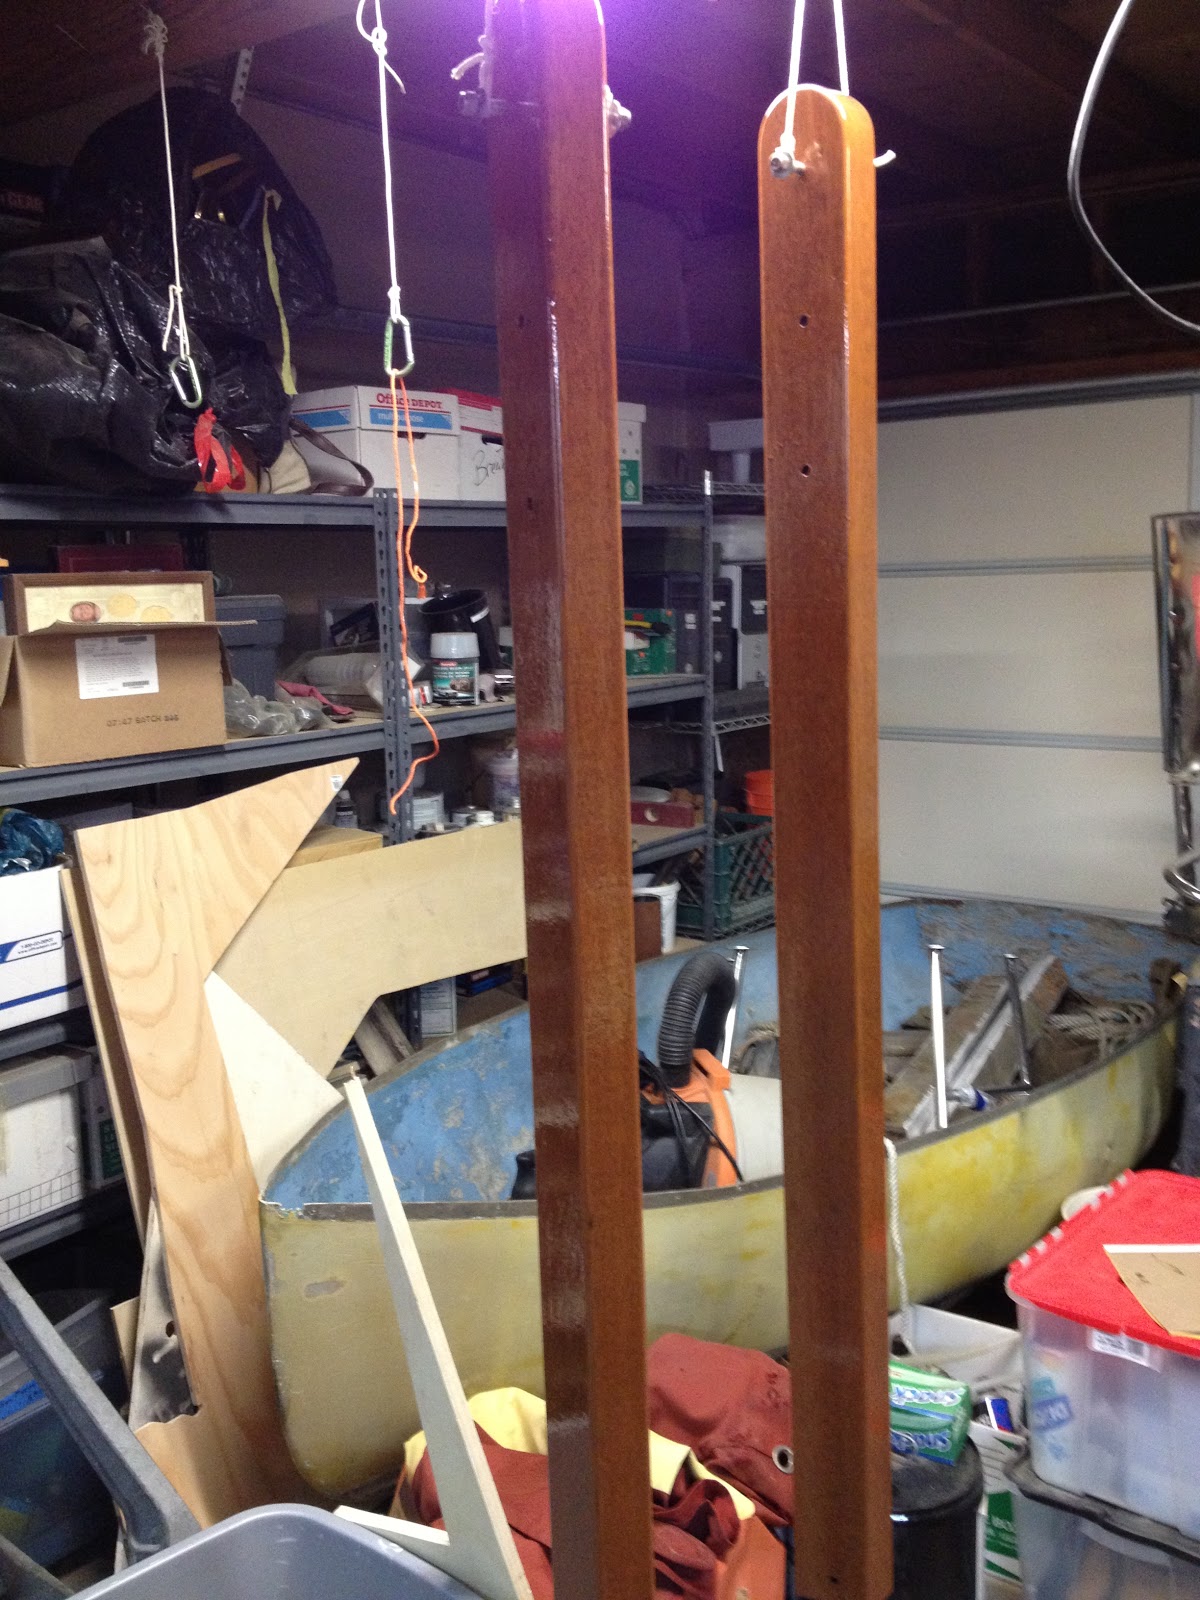
The old versus the newboomkin tangs. FYI these old tangs were known for breaking and bringing down a mast or two. It was a no brainer to replace them. They would break at the top hole in the picture. There is very little metal there for how much tension the get.

The old ones didn't leak. Do you think I need a bottom paint job!

New tang and stay installed. I had the rope tied to it in case I dropped it while installing it.

And the cheeks installed and the boomkin installed with the back stay attached. (The back stay is the "cable" coming from the middle top of the picture to the end of the boomkin...it holds up the mast.)
See the rope hanging off the end and going into the water? Yeah, well, that is for the diver so he knows where to look for my craftsman 3/8" ratchet and socket that decided to jump out of my hands! Did I tie a rope to that...nooo, I won't drop it. I'll be "careful".  (Curtis this is all your fault...this is what we were talking about this weekend!)
By the way the diver that cleans my hull will fetch my dropped items for free...if he can find them! Maybe he can pick up my $12 stainless bolt and rubber sanding block from a few months ago too. They say global warming is causing the ocean level to rise....it is actually me just dropping stuff that is raising the ocean level. Sorry Mr. Gore!
 
I know the wiener dog floats......don't ask.

Thursday, February 14, 2013

Cetol(ing) the rudder cheeks and boomkin

Just so you know I'm not slacking off after work I get home and put one layer of cetol on each night. Here is how the layer count goes:

Rudder cheeks = 2 coats of penetrating epoxy, 2 coats of cetol teak light and 3 coats of cetol gloss. They are done.!
Boomkin and the six boomkin spacer blocks = 2 coats of penetrating epoxy, 2 coats of cetol teak light. Only 3 coats of cetol gloss to go before I can install them! Maybe I can get it installed on Sunday or Monday. That would be nice!


Tuesday, February 12, 2013

Engine Pan Liner Top... making progress

Two posts ago I showed you how I cut up the engine pan. I had already cut the new tops and coated them with penetrating epoxy getting them ready to install. This last weekend I worked on the boat in the engine room again. I cut a bit more of the fiberglass pan of in order to give the engine more room and to make it look like it was not done by a complete amateur. (But it was....me.)  I made a ton of dust again cutting out just a few pieces. Amazing how "dusty" fiberglass gets when cut.

Here is a picture as I left it before the new cuts then a picture with the new cuts.


You can see I removed more from the aft end.
 
I cut two stringers to mount just a bit below the height of the remaining pan on the hull. This stringer was attached with thickened epoxy to hull sides. I used a lot of thickened epoxy to build up a ledge for the stringer to "sit" on and support the plywood at the hull. I then used thickened epoxy and covered the stringers with it and the pan where the plywood sits on it. I was generous with the epoxy to make sure the plywood was sitting in a lot of it to bond it well. FYI, I did scuff up the hull with the grinder and sanded the other areas with 60 grit so the epoxy had something to bite into as it cured. But it was taking a long time to cure by now as the temps were in the low 60's. 
You can see the fillets of epoxy between the hull and the 3/4" plywood.
 
I left the epoxy to cure and will come back this week sometime to apply several layers of cloth to tie it all together as one big piece.
 
One last thought. I will end up cutting my cockpit hatch in two. That thing is heavy and cumbersome to lift. I can't see having to remove it if needed in a seaway. It would be difficult at best! But that will have to wait. I want to get my engine installed!!!!


Wednesday, February 6, 2013

Finally getting to the rudder cheeks and boomkin again

Man it seems like time is flying by and passing me up. I picked up my rudder cheeks and boomkins right before Christmas and here it is early February!  Sunday before the super bowl I gave them all a coat of penetrating epoxy. This was the second coat for the cheeks and the first for the boomkin. Monday night I went out and took the cheeks and boomkins down from their hanging position in the garage last night to wash the epoxy blush off. This time I didn't wash them in the kitchen sink! You can read about that here.

 I hung the boomkins back up and gave them another coat of penetrating epoxy. The last one for them before they get the cetol. The cheeks I sanded them down to get the drips and runs out (How could I get drips and runs when I was thinking I didn't put enough epoxy on?) to prepare them for the gazillion six coats of cetol I need to put on. I am going to do the top, let them dry then do the bottom. So this should take some time. I really want to try and get a nice smooth finish on the cheeks and I'm not so good at smooth. So we'll see how they turn out. the main thing is that they get protected. We all know protection doesn't have to be pretty.....right?

Here is the boomkin hanging with it's second coat of epoxy drying.
Sorry about all the clutter in the background...I'm building a boat!


And the cheeks with their first coat of cetol teak light. They "look" OK now, lets see tomorrow.
Look in the upper left corner you can see the engine pan tops. I also coated them with penetrating epoxy on Sunday.

Stay tuned and watch epoxy dry!


Tuesday, February 5, 2013

Cutting the engine room liner.

I made a template of my motor with the mounts attached so I could use that to see how high or low I needed to raise the engine bed. (You know the part that the engine bolts to. Patty B. that was for you!)
You can see the engine mounts under the wood and the wooden dowel is the center line of the transmission. That is where the propeller shaft and the engine need to line up. The engine and the propeller shaft need to be within thousands of an inch to be done correctly. This will keep the engine vibrations down to a minimum. (I want smooooth sailing, uh ok motoring also.)

I took it to the boat and give it a try figuring the difference would not be to much.
Yeah, no. I will have to move the engine forward and down about two inches. The engine mounts are at the bottom of their travel so they will not go any lower.Mmmmm what to do? I figure I will try and cut out just the sides to see if that would at least give me more room to move the engine back to line up with the shaft. It can't hurt I have to lower the engine somehow.
 

No luck, you can see I still have a ways to go down.

What's next...major surgery of course! I measure how low I need to go and then add some to that just in case. I made a ton of fiberglass dust cutting the fiberglass with a 4" grinder and a sawsall. I had on a good respirator and a long sleeve shirt and a hat to keep the "pricklies" down to a minimum. After the dust settled this is what I have left of the pan. Why, you ask, don't I just cut out the whole pan? Well I really want a pan to catch any oil drips from the engine. That way it keeps it out of the bilge and out of the ocean. ($$$ in fines!) I thought you would see it my way.
Here is what was left.

Sorry the picture is a little "cloudy". I guess the air had not yet cleared.

I then proceed to make new "beds" for the mounts to mount on. Here is what they look like.


I still need to cut off the fiberglass that is on the sides in the lower part of the picture. I will take the new beds home and fiberglass them with cloth. I'll bring them back and then fiberglass then to the boat and to the pan. I used 3/4" plywood for these beds. The ones I cut out were 1/2" plywood. I think this would be better plus the new engine weights about 100 pounds less than the old one. So I should be good.

Here is the engine mock up sitting on the "new" pan tops. They have not been glassed in yet. Still just test fitting.  I still do not like the finial location of the engine as it is really close to the forward bulkhead. But you can see the shafts lined up nice! I still have some tweaking to do to get it in it's final location. That will have to wait for next weekend.